Sunday, September 28, 2014

Zucchini-Oat Chocolate Chip Cookies

Flattened Cookie (left) vs. Unflatted (right)
My aunt has been known to say that you can tell those that don't have many friends in the grocery line as they are the ones buying zucchini.  Well thankfully my mom is a great friend and sent some my way as she had a surplus in her garden!  Otherwise I would be one of those friendless sad people in line having to buy my zucchini!! Anyways, I found this great zucchini chocolate chip cookie recipe on pinterest from a blog called Cooking Classy - I've linked the original recipe here.  (The pics on that site are way better!)  My boys aren't a fan of zucchini but they LOVE it in these cookies!  


Zucchini-Oat Chocolate Chip Cookies
1 1/2 cups all purpose flour
1 tsp ground cinnamon
1/2 tsp baking soda
1/4 tsp salt
1/2 cup unsalted butter, softened
1/3 cup granulated sugar (1/2 cup in original recipe)
1/3 cup packed light-brown sugar
1 large egg
1 1/2 tsp vanilla extract
1 1/2 cups shredded zucchini (from about 1 - 1 1/2 medium)
1 1/2 cup quick oats (1 cup in original recipe)
2/3 cup semi-sweet chocolate chips (1 2/3 in original recipe)
(3/4 cup chopped pecans or walnuts - I omitted)

Mix the first four ingredients together in a medium bowl.  In a separate bowl, cream the butter and sugars together, then add the egg and vanilla.  Once well mixed, add the zucchini.  Next, slowly add the dry ingredients to your wet mixture and once all incorporated, add 1/2 cup of the chocolate chips.  As in the original recipe, I saved 2/3 and added the remainder on top of the cookies to make them a little more enticing to my boys!  Roll into balls and place on cookie sheet with 2" space between them.  Bake at 350 degrees F for 11-14 min.  **My first dozen I baked for 20 minutes as they didn't really flatten, so my 2nd dozen I flattened with a fork and they came out perfect at 12 minutes. 

Unflattened x5 cookies on left and the rest flattened!
I omitted the nuts due to allergies in our house and added an extra 1/2 cup of oats to substitute.  

We went through a half a dozen cookies before the next dozen was pulled from the oven!  Using my medium Pampered Chef cookie scoop, this recipe made 25 cookies.


Tuesday, February 4, 2014

Egg Free Banana Chocolate Chip Muffins

Hello friends!
So my youngest has an egg and peanut allergy, thus leading me to find new adventures in baking.  I am cautiously optimistic that he will outgrow these allergies, but in the meantime I've been experimenting with substitutions in some of my favorite recipes.  My (and my kids') favorite muffin recipe is from my dear friend Camille - her delicious Banana Chocolate Chip Muffins, which I previously blogged about here. I only did one small teeny weeny change to it, and that was to substitute the egg for ground flax seed mixed with water!  That's it!  So here is the updated recipe:

Banana Chocolate Chip Muffins
1 1/2 cups white sugar (I only added 1 cup actually)
3 TBSP milled flax seed 
9 TBSP water
1 cup applesauce
2 cups flour (I used 1 1/2 cup white flour and 1/2 cup whole wheat flour)
2 tsp baking soda
1/2 tsp salt
2 tsp cinnamon
2 cups mashed bananas
1/2 cup chocolate chips or however much you want! (optional)

Flax Seed and Water
Mix flax seed and water together in a medium bowl and let sit for 5 minutes.  Grease 2 muffin tins (skip this step if you're using paper liners). Beat together sugar and flax seed mixture, then mix in apple sauce. In a separate larger bowl, mix flour, baking soda, salt, and cinnamon.  Make a well in the center and add your wet mixture to your dry mixture, and stir only to mix (don't over stir or your muffins will be heavy!).  Mix in mashed bananas and chocolate chips. Pour (or fling if you're so inclined) into muffin tins or paper liners until cup is about 2/3 full and bake at 350 degrees for 20-25 minutes. Let cool on a wire rack.  This recipe only made 18 muffins, while the original recipe made 2 dozen!  

I phoned Hershey's, and was happy to find out that it will definitely say if there is a possibility of cross contamination between the chocolate chips and any nuts on the back of the chocolate chip package.  So I can use this brand with confidence, but will still be double and triple checking the label every time before use it, I'm sure!

Monday, September 2, 2013

Broccoli and Cheese Tarts

Wow! It's September already - a whole 8 months since the last time I posted.  I've definitely been keeping track of new recipes that I've tried but just haven't had the time (or energy) to actually go through the act of posting them.

So Reed is now 7+ months old and is thoroughly enjoying chowing down on any and every food I put in front of him.  I've really been embracing the Baby Led Weaning philosophy and Reed has jumped on board.  I do still give him some purees like apple sauce, yogurt, and Baby Gourmets, but the majority of his foods range from sucking the juices out of a big piece of steak to sweet potato and beet sticks and chomping on a cob of corn (sans corn).

I recently came across this recipe for Broccoli and Cheese muffins used it as a mini-tart recipe instead.  Grayson loved them and I can't wait for Reed to try them in the morning!  Click here to go to the recipe.

Changes:
 I didn't have self rising flour so I used my plain all-purpose flour and added 2 1/2 tsp baking powder.  I also added 1/3 grated Parmesan as well as 2/3 cup grated old cheddar and added some pepper for seasoning.  I definitely did need to add the milk as  suggested in the recipe and baked it at 400 degrees Fahrenheit for 15 minutes.  This recipe made 36 mini-tarts for me.

Next time I will mix it up with the spices and flavour combo's.  I'm thinking of using feta, dill and spinach in place of the broccoli for a nice little Greek twist on it.  Broccoli and spinach are both high in iron so this just makes it doubly good for my little one!  I really like that the recipe uses yogurt in the mix - a little added calcium and protein never hurts.

Tuesday, January 8, 2013

Pulled Pork Turnovers

I find when I make pulled pork, I can never make a small quantity and there are always mass leftovers.  These leftovers never seem to be used up in a timely way, so I always end up tossing them into the freezer.  I was cleaning out my freezer before Christmas and found a forgotten about container of pulled pork leftovers and thought to myself, "How will I get Grayson to eat this?"  He really likes being able to pick up his food instead of needing a fork or spoon, so I thought making them into a turnover might just work.  Well... it didn't work, Grayson wouldn't even try them... but Mike and I sure enjoyed them!
Pulled Pork Turnovers

Pulled Pork Turnovers
1 roll of puff pastry, thawed in the fridge overnight
2 cups leftover pulled pork
1 cup grated cheddar
1 egg
1 TSP sour cream or cream or milk

Roll out puff pastry, cutting into 6 triangles.  Place 2-3 TBSP pulled pork on each puff pastry triangle and top with a sprinkle of grated cheese.  Fold the edges of the puff pastry over to make a triangle, making sure it's sealed tightly. Place on a parchment paper lined baking sheet (or non-stick tin-foil or even just a greased baking sheet) and slice a couple of vent holes in the top of each, allowing for steam release.  Beat the egg and cream together and brush the egg wash over the top of the turnovers.  Bake in the oven at 375 degrees for about 15-20 minutes or until nicely browned.  

Tip:  Because I was using left over pulled pork that had been frozen, my pulled pork was quite watery.  I found the best results if I let the pork drain a bit and squeezed some of the excess moisture out.  


Saturday, January 5, 2013

Peanut Butter Snowballs

I suppose I should preface this post by saying that Grayson is a very picky eater.  He turned 2 in November and for his birthday, I wanted to make something special for him.  One problem... he doesn't eat cake.  Doesn't eat cake you say?? Is he crazy?? Well.. he's 2.. and he's stubborn to try new things... and well... he's 2.  Around that time, one of his staple foods that he loved was peanut butter.  He would carry the jars (one crunchy, one smooth) around with him asking for a spoon and a butter knife.  So naturally I was looking for a recipe for something sweet and delicious that had peanut butter in it and that wasn't cake.

As luck would have it, my Kraft What's Cooking magazine showed up about a week before his birthday, which had a couple of different peanut butter dessert recipes included.  The recipe for Peanut Butter Snowballs seemed incredibly simple and like something that would be a big hit. (Click link above for recipe.)  Despite Grayson's love for peanut butter, his stubborn streak showed itself and he refused to even have one bite of the peanut buttery goodness.  We've made them a couple of times since (delicious and gets rave reviews every time) but he has yet to try one.  

Peanut Butter Balls
The tip Kraft gives is to roll the balls in the chocolate using two forks.  This worked well but was the most time consuming part as you had to let each drip the excess chocolate off before placing on your wax paper lined cookie sheet.  All in all though, it was a super easy recipe and it's definitely a favorite!

Monday, April 9, 2012

Cauliflower Mashed Potatoes

The world may have already known about this but I just figured it out!  Welcome, Cauliflower Mashed Potatoes!  Mike is not a fan of cauliflower in the best of times (drizzled with cheese) so I wasn't sure how this dish was going to go over.  Have no fear - he loved it and was so impressed that he couldn't even taste the veggies!  As did Gray, as he's a huge fan of mashed potatoes and didn't bat an eye when he ate this.  I can't remember where I got the idea for this but I literally treated this dish like I was making plain old mashed potatoes!

Cauliflower Mashed Potatoes  
4-5 large potatoes, peeled and cubed
1 head of cauliflower, washed and cut up into chunks
2 TBSP butter
2 TBSP olive oil
S&P to taste
garlic powder to taste
3/4 cup grated cheddar

Boil potatoes and cauliflower in a big pot until both are fork tender.  Drain the water, add the rest of the ingredients (except cheese) and mash until smooth.  Give this a good final whip to make sure you have all the lumps out.  Add the grated cheese and stir to combine.  Cover until ready to serve.  Serve to your family and don't tell them that they are eating vegetables!!!

*My recipe is enough to feed a family of 4-6!  Cut this recipe in half if you have nobody else to feed and hate leftovers.

Monday, March 26, 2012

Vietnamese Cold Rolls

This was my first time making Vietnamese Cold Rolls and I was extremely impressed with how easy they were and how delicious they turned out!!  I've had rice paper in my pantry for over 3 years and threw it out the last time I moved without it ever being touched.  I bought some again about a month ago, determined that this time I would actually use it.  (I checked the best before date on it just in case they did end up sitting around for a while and they're good until 2013 -- phew!)  I got thinking today when discussing these with a colleague, that it would be really easy to "North Americanize" these rolls as well.  You could fill it with whatever suited your fancy at the time -- Honey Garlic Chicken? Sure why not!  Lemon Pepper Shrimp?  Yes, please!   Montreal Spiced Steak? ooh Mike would like that one.  Anyways, enough with my rambles, here is my recipe (which I didn't actually use a recipe, but I did follow the directions on the back of my rice paper on how to 'cook' it!

Vietnamese Cold Rolls
*1/2 pack vermicelli rice noodles
8 rice paper circles
1 raw carrot, peeled and grated
1/2 cucumber, grated
1/2lb ground pork
S&P to taste
1/2 large onion, diced
1/2 tsp garlic powder - or the real deal if you have some handy

(You can easily adjust these spices to suit your tastes! Like it spicy?  Add some cayenne or some hot sauce)

Scramble fry the ground pork with onion and spices until cooked through and no pink remains.  Set aside.  Boil a pot of water, remove from heat and add the vermicelli.  Let sit for 5 minutes until soft, then drain.  Fill a pan (large enough for your rice paper to dip in) with warm water.  Immerse one sheet of rice paper in warm water for 5 seconds.  Remove and lay flat.  Starting at the bottom of the circle of rice paper, fill with two TBSP each of pork, carrots, and cucumber.  Add generous amount of vermicelli noodles.  Fold the left and right sides over the filling and then starting at the bottom, roll it up until it is completed sealed.  Repeat filling and rolling until all the mixture is done!  Serve with peanut sauce for dipping or any other kind of sauce that you would like!

*The vermicelli rice noodles that I bought (Double Happiness Brand) actually were separated into bricks inside, which made it super convenient to only cook half.  I've purchased other brands that the whole package was one brick and impossible to divide it up.

Sunday, March 11, 2012

Slow Cooker Pulled Chicken Taco's

Ok, I only have two seconds but I wanted to share my new concoction with the world!  And it's possible that this already exists, but I've never heard of it before so I'm claiming this as an original recipe.  I was thinking of Auntie Mar's chicken and loving it but thinking about all of the fat and calories that comes with using French dressing.  So at the grocery store this week, I was looking for something similar but a whole lot less calories, and I came up with a brilliant idea!  I have a taco salad recipe that calls for Catalina dressing to be poured over top, which gave me the idea of combining these ingredients....

Slow Cooker Pulled Chicken Taco's
1 lb boneless skinless chicken thighs
1/2 bottle Kraft Calorie Wise Catalina Salad dressing
1/2 package taco seasoning (I used Epicure's taco seasoning pkg)
1/2 cup water
1 cup prepared rice

Mix dressing with taco seasoning and water in slow cooker.  Add the chicken, turning to coat.  Cook on low for 8 hours.  Once cooked, using two forks, pull apart the chicken thighs.  (This should be very easy and the chicken will just fall apart.)  Add the rice to the chicken mixture, stir, and serve in a soft tortilla shell with grated cheese, lettuce, and diced tomato.

**black beans would also go good with this!

I hope you enjoy this recipe -- we sure did.  (Even Gray loved it!!)

Sunday, February 12, 2012

Auntie Mar's Chicken

Hello, friends!
I've missed you too - thanks for stopping in! :) I had a little accident tonight while cutting up a honeydew so my thumb is wrapped in a band-aid and it's making it difficult to type!  You know, I didn't think it would really get in the way either, but instead of hitting 'space,' my thumb is too big and I hit the 'b'!  But I've been wanting to blog for a while - I have so many great recipes to share!  My new favorite recipe is one that I got my from Auntie Mar and it just delicious!  And it honestly only takes FOUR ingredients!  (You can even get away with only using 3 of them, too!)  This turns out to be kind of like a sweet and sour chicken, but the sauce could also be used as a gravy.  I'm always searching for new ways to serve quinoa, and this chicken and sauce was perfect!!  It also goes very nicely with mashed potatoes or rice.

Aunty Mar's Chicken
1 lb boneless, skinless chicken thighs
1/2 can jellied cranberries*
1/2 pkg onion soup mix
1/3 container Kraft French dressing

Mix last three ingredients together in a roaster.  Add chicken and stir to coat evenly.  Bake at 300 degrees F for an hour and a half.  Serve

*You can freeze the other half of the cranberries and it's ready for the next time you make it!
**I've also made this without the cranberries when I didn't have it on hand and it is just as delicious, just a little bit less sweet is all.  I use more French dressing (about 1/2 container) if I'm not using the cranberries.

I'm sure you will enjoy this as much as we have!

Sunday, January 15, 2012

Chili Salad? YES!

Is that Chili Salad you ask?  Why yes it is - I'm glad you asked!!  I made this a while back and it really was a fantastic combination!  Take one bed of spring greens, top with one tried and true recipe for Chili, add some crumbled tortilla chips and finish off with some grated cheese.  Seriously, can't get any better!  (and it's a great way of making Mike eat salad -haha).

My Tried and True Chili Recipe
1 lb lean ground beef
1 large onion, diced
1/2 tsp minced garlic
1 can of corn, drained and rinsed
1 can of black beans, drained and rinsed
1 can of kidney beans, drained and rinsed
1 can of diced tomatoes, with liquid
1 cup of salsa (or if not on hand, I actually use tomato soup)
2-4 TBSP chili powder (my stock is old so I use lots!)
S&P to taste

Scramble fry the ground beef and onion over medium heat until beef is no longer pink.  Drain and rinse in the sink to get rid of the extra fat.  Add all other ingredients into the pan and let simmer for about half an hour (l.onger if you have the time!!).  

Tuesday, January 3, 2012

Turkey & Broccoli Divan - Turkey leftovers!

Turkey & Broccoli Divan - Served on a Bed of Quinoa.
I like posting recipes that involve using up leftovers.  Although I wasn't the one cooking the meal, we still ended up with a lot of turkey!  I decided to substitute leftover turkey in one of my favorite recipes  - Chicken & Broccoli Divan (a Campbell's Soup Recipe).  I actually had some leftover spinach dip and some sour cream that I had in the freezer that I threw in too!  The turkey really added a nice change to this recipe and I will definitely use up turkey leftovers the same way in the future.  

The only changes I made to the recipe (other than the additions above) was substituting two cooks up chopped up turkey for the chicken.  I, as always, add a lot more bread crumbs than recommended, as I love a nice crisp crust on top.  I used panko crumbs, which I like because they seem to make a crunchier top than regular bread crumbs. 

The link above is to my post about Chicken and Broccoli Divan, but if you want to go straight to the Campbell's recipe, the link is here.


Thursday, December 29, 2011

Sous Vide Pork Loin

And We Meet Again!   Hello there you faithful reader(s)!  I do realize that I am two weeks tardy on this post, however, with a sick boy and the holidays, there has been little time for myself.  And when I've had time, I sunk into bed with my book (The Psychopath Test by Jon Ronson - interesting non-fiction read).  Alas, that has finished and I have a couple moments, so here I am.

Thanks to Mike's boss, we have been introduced to the lovely world of Sous Vide.  It's essentially a super slow cooker that you use to make lean cuts of meat super tender.  You seal the meat in a ziploc bag (or sealed bag now that we have a foodsaver system- yay Christmas!) , throw it in your cooking vessel, plug it in, set the temperature around 140 (different for different cuts of meat), and let it cook for a day or two (or three!).

So we bought a cheap pork loin from Costco, cut it into roast size pieces, found a delicious spice rub, and went to work.  (And by 'we' I really mean 'Mike' as this is his baby but is just so good I feel I have to share!)   The rub he found was the Meatheads Memphis Dust Rub Recipe, which you can find here from www.AmazingRibs.com.

We did two pork loins as we were having a Christmas potluck and had a lot of hungry mouths to feed!  
We cooked it for 2 days at 140 Degrees F and the result was pure heaven. Mike did a quick sear on the meat just to get some appetizing color to the meat.  To be honest, I didn't realize that pork wasn't supposed to be dry.  The tenderness and the moisture was incomparable to any other pork dish that I've ever had!  Thank you, Mike, for a wonderful meal.  Yummmmmmm.

Saturday, November 12, 2011

Quick Ground Beef Curry

Ever since my cooking classes earlier this year, I have been a lot more experimental with different flavors and spices.  Curry was my biggest enemy and now we are becoming at very least, acquaintances.  I ventured out to try this ground beef curry recipe after a quick google search brought up this CBC program "Best Recipes Ever" recipe located here.

To be honest, it wasn't that quick and I used the wrong type of curry.  I used a yellow curry powder, as it was all I had, and it was much too mild.  I think if I would have used the Madras Curry (which is a lot spicier apparently), this would have been much more flavorful and I would have enjoyed it more.  With that being said, Grayson liked it anyways!  I served it on basmati rice with a side of garlic naan bread.

Death By Chocolate

Death By Chocolate always reminds me of two women - my mom and my best friend Camille.  My mom has made this several times over the years (including for dessert the night Mike and I told our parents that we were expecting!)  And I remember the first time I met Camille -  it was at a birthday party and she had made the hugest vat of Death by Chocolate that I had ever seen!!! 

Every time I've had this or made this, it always tastes just a little different but is always phenomenal.  I think one of the biggest reasons for that is generally, you use whatever you have on hand and you don't measure!!  The skor bits on top could easily be replaced by pieces of and kind of your favorite chocolate bar, chocolate shavings, or even drizzled with caramel.  You could add berries or nuts and everyone would still love it.  It's a classic dessert that very seldom has any leftovers, no matter the version you make!  
Death By Chocolate
1 box of chocolate cake, prepared according to package directions and cubed. (My trifle bowl will only hold a 1/2 a cake, so I cube up the rest and freeze the other half - another dessert ready to go!)
1 tub of low fat cool whip
1 package of chocolate pudding, prepared
1 or 2 cups of Kahlua (optional)
1/2 cup skor bits

Place 1/4 of your cubed chocolate cake into your trifle bowl, ensuring the bottom is completely covered.  Top with 1/2 the Kahlua, 1/2 the pudding, 1/2 of the cool whip and 1/2 of the skor bits.  Repeat layers. Refrigerate for a couple hours to let all the Kahlua soak into the chocolate cake.  Serve to your guest OR grab a spoon and head for a nice quiet room where nobody will bother you!

Of course you don't have to use a trifle bowl, it really is just used for presentation so you can see all of the pretty layers.  You could also use a large glass bowl - or even an  old ice cream pail.  I promise you it will taste just as good! 

Zucchini Wedges

My mom introduced me to this recipe last week and we made it again for supper tonight!  It's a great way to use up some of the zucchini that grew amazingly big this year.  This is a much healthier version of pub-style food and satisfies that craving without the greasiness you get with deep frying.

Panko Crusted Wedges (left) and Shake 'N Bake Wedges (right)
I wanted to try two different coatings for the wedges so I used Shake 'N Bake (on the right) and made my own coating with panko crumbs and Epicure's Lemon Dilly spice mix (on left).  My preference? The Shake 'N Bake by far were the favorite in our house.  The color was more appealing, it had more flavor (which most definitely means a lot more added salt), and I really liked the texture.  The panko crumbs are made from only the inside of white bread (no crusts), which is why the color is so light, and whereas the crunch is usually quite nice - it just didn't compare to Shake 'N Bake!

Zucchini Wedges
3 cups zucchini, cut into wedges that are about 1"x3"and about 1/2 inch thick.
1 egg, beaten
1 package Shake 'N Bake Crispy Coating

Preheat oven to 350 degrees F.  Dip zucchini wedges in egg, and then toss to coat in breadcrumbs.  (can use plastic bag and shake it around or in a bowl and just flip it around to coat all sides).  Place on greased baking sheet.  Repeat until all zucchini wedges are coated.  Bake at 350 deg F for 25 minutes, or until fork pierces easily through zucchini.

*You could use this for other kinds of vegetables as well!  Get creative!

Brunch edition: Thyme Scrambled Eggs

Lately when I'm cooking, I find myself asking, "What can I make that Grayson will actually eat?"  He rarely wants to stop playing to eat, so a lot of the time (against my better judgement), I am feeding him on the go.  Every now and then, I'll find something that he will actually sit still for in the highchair and just devour!  What you ask?  Eggs!!  Instead of serving him just boring old scrambled eggs, we step it up a notch and add some real flavor by adding some fresh thyme!  It's really a balanced meal with elements from each of the food group included.  And the best thing is that it's not a super messy food for him to feed himself!  Usually most gets in his mouth and only a little on the floor, which is always considered a huge success!

Thyme Scrambled Eggs
4 eggs
1/8 cup milk
1 TSP fresh thyme 
1/2 cup grated cheese (we like old cheese with our scrambled eggies, but use whatever you've got on hand)
Salt and Pepper to taste
1 small tomato, chopped 

Preheat skillet and melt about a 1/2 tsp butter/margarine.  In medium size bowl, whisk first three ingredients together. Pour into hot pan, topping with the rest of the ingredients.  Once the egg white starts to cook, scramble them repeatedly until eggs are cooked and no longer runny.  Serve with a slice of whole wheat toast.

*we usually fry up some sausage to go along with this and cube it up for him.  The farmers sausage that Coop makes in store is absolutely delicious and is preservative free! yumm

When served with toast and sausage, this recipe is enough to feed all three of us!  

Open Faced Turkey Sandwich with Garlic Aioli

Grayson Shark Halloween/2011
 Hi everyone!!  Wow - I can't believe it's the middle of November already!  My little boy turns one tomorrow!

New updates on our life:
-Grayson is walking!
-I got a new job! I am now working in the College of Nursing at the University of Saskatchewan as the newest Clinical Placement Coordinator!  (Yay for no more shift work or nights!)
-Grayson started daycare last week
-Mike successfully went hunting white tail for the first time.  We have the tenderloin in the fridge, ready for tomorrow nights supper!

 This fall has just flown by and I haven't been able to keep up with my blog.  I have been keeping track of different recipes that I've tried or new twists on old recipes.  As much as I like my new recipes that I try, there's nothing like a good old comfort recipe to satisfy your cravings.  After Thanksgiving, we were lucky enough to have some turkey leftovers sent home with us from my MIL and some fresh garden tomatoes from my mom.  Mike and I were both starving one night and we wanted something quick, so I whipped up these yummy open faced turkey sandwiches, and they were a total hit!  You might ask why I am putting something as simple as a sandwich in my blog, as I asked myself that same question.  I guess the answer would be because sometimes you just don't know what to do with those turkey leftovers!

Open Faced Turkey Sandwiches with Garlic Aioli

4 slices of bread, toasted (I use Alsask bread from Family Bakery - a multigrain type bread)
1/3 cup mayo
1/2 tsp lemon juice
1/2 clove garlic, minced (or more if you prefer!)
Salt and Pepper to taste
2 large tomatoes, sliced
1 cup leftover turkey
1/2 cup grated cheese (I like using old cheddar as it gives it more cheesy flavor!)

Preheat oven to broil.  Mix mayo, lemon juice, garlic and salt and pepper together.  Spread on each slice of toast.  Top with tomatoes, turkey, and grated cheese.  Broil for 3-5 minutes, watching closely so it doesn't burn!


Tuesday, October 4, 2011

Easy Tomato Side Dish

Standy Magee! 10 1/2 months old
 Hi everyone!!

Yes, I realize it's been almost two months since my last post but the weather has been way too nice to spend that time indoors!  We've been super busy with play dates, going to the farm to help out with harvest, and really just enjoying watching Grayson grow and learn!

Things new in our life:
Gray has 6 teeth, is cruising around like crazy, standing without assistance for short period of time, and is almost fully weaned!
I go back to work in under 3 weeks
We started p90x again! (abs, please come back, I miss you!)

So, since Grayson is eating pretty much EVERYTHING we are eating, I've been trying to expand my repertoire of recipes to introduce him to new flavors and textures.  This is also introducing Mike and I to new flavours and textures and we have been loving it!  Experimenting with different spices, preparation methods, and cooking styles has been a lot of fun and I can't wait to show you guys what we've been cooking!

For now though, due to limited time (Gray's going to wake up from his nap any minute) and the abundance of fresh tomatoes from everyone's overflowing gardens this year, I will post this super simple and super quick recipe for Broiled Tomatoes.  I can't remember where I got the idea for this, and I'm sure there's a million versions of it out there, but this was my first attempt at broiling tomatoes and it turned out great!

Broiled Tomatoes
3 large tomatoes
1 heaping TBSP margarine
1/3 cup panko breadcrumbs
salt and pepper to taste

Preheat oven to broil on high (500 deg F).
Cut tomatoes in half lengthwise, removing the stem and the hard white part that attaches to the stem.
Score tomatoes with a knife in a checkerboard fashion across the cut side of the tomato.
Melt margarine in microwave for 15 seconds, add salt, pepper and breadcrumbs, stirring to combine.
Place tomatoes cut side up on a baking sheet. Divide the breadcrumb mixture between all 6 halves of tomatoes, pressing the breadcrumbs into the flesh of the tomato (this is why you scored it - so the yummy breadcrumbs could really get packed in there!).
In middle of the oven, broil for 2-3 minutes or until breadcrumbs are nicely toasted.

Things I would change next time - I'd maybe cook them at a lower temperature so that the tomatoes were hotter, as the breadcrumbs browned very quickly.

*Mike is on a 'no added sugar' diet for the month of October, which includes bread and bread products such as you guessed it - breadcrumbs!  I just used the butter/salt&pepper mixture on his tomatoes before mixing in the breadcrumbs for mine and Gray's.  He said his was delicious too!

Wednesday, August 10, 2011

Cooking Class: Spanish Tapas

In July, Brigie and I took a cooking class through Simon's Fine Foods.  We saw it on kijiji deals, and scooped it up right away.  Basically the deal was for  2 for 1 cooking classes.  The first cooking class we chose was Spanish Tapas.  Tapas are served as small platters of food instead of large meals.  They can be an appetizer or you could have several different tapas to make up your main meal.  

The menu that Simon had made up for us was absolutely amazing.  Some of the tapas were hot, some served cold, and all served delicious.  Simon was super relaxed and very easy going, making it a lot of fun.  We had a choice of which dishes we wanted to prepare, while working in pairs, and I think there was only one dish that we didn't make (out of the possible 9!) as we ran out of time.

**All recipes below I obtained through the cooking class at Simon's Fine Foods.
 Things that I learned:

  • How to peel a tomato: After scoring the bottom of a tomato with an 'X' and cutting out the stem, place in boiling water until the skin starts to blister and then place in ice bath to stop the cooking process.
  • How to cook with fresh herbs such as basil, thyme, and rosemary.  After you've removed the fresh herb from the stalk, freeze the stalk and use it when you're making soup for extra flavor!
  • First time I've ever cooked with curry, turmeric, or coriander. 

Prosciutto wrapped Honeydew

Pork Kebabs (Pinchitos Morunos)- probably my favorite dish -  Brigie and I made these!  Simon says these are eaten all over Spain and were brought into the country from Africa.  It's funny because they actually struck me as very African Tasting!  It seriously tasted like I was very far away from home!  Transported me to some exotic vacation spot.


1 lb. lean pork, cut into small cubes
2 garlic gloves, finely chopped
2 teaspoons salt 1 teaspoon mild curry powder or pinchito spice mixture
1/2 teaspoon coriander seeds 1 teaspoon Spanish paprika
1/4 teaspoon dried thyme
Freshly ground black pepper 3 tablespoons olive oil
1 tablespoon lemon juice
Preparation
Crush the garlic with the salt in a mortar (or with the flat of a knife on a board), then work in the other ingredients.
Skewer the pork, 3-4 cubes to a small stick, and marinate them in a shallow dish with the herbs (pinchito spice, coriander, paprika, and thyme), turning so they are well coated. Leave at least a couple of hours.
Spread the pinchitos out well on a barbecue or on foil under a grill. Cook them under a high heat for about 3 minutes on each side.

*We only marinated them for about 25 minutes and cooked them in the oven instead of the grill.

Gaspacho - chilled vegetable puree soup.  I thought this dish was okay - but I'm not a huge red onion fan.  Everyone else LOVED this.  It did taste amazingly fresh though!

Bread with Mushrooms and Aiolli - this was incredible! and I don't even like mushrooms!  First time I tried sherry too, which the mushrooms were cooked in.  It really reminded me of a Port -- tasted like a very sweet wine.  I really enjoyed the crunch of the crostini and the creamy aiolli sauce (mayo mixed with garlic.)

Meatballs with a Red Wine and Fresh Herb Sauce - Brigie and I made this and I have to say they were probably the best meatballs I've ever had!  The meatballs themselves had fresh herbs too (as well as the sauce) and was absolutely amazing!!

Meatballs in tomato sauce
Ingredients 2 tablespoons of olive oil
8 oz ground beef
1 cup (2 oz) fresh white breadcrumbs 2 tablespoons grated Manchego or Parmesan cheese
1 tablespoon tomato paste
3 cloves garlic, chopped fine
2 scallions, chopped fine
2 teaspoons chopped fresh thyme
1/2 teaspoon turmeric
Salt and pepper, to taste
2 cups (16 oz) canned plum tomatoes, chopped
2 tablespoons red wine
2 teaspoons chopped fresh basil leaves
2 teaspoons chopped fresh rosemary
In a bowl, thoroughly mix together the beef, breadcrumbs, cheese, tomato paste, garlic, scallions, egg, thyme, turmeric, salt, and pepper. Using your hands, shape the mixture into 12 to 15 firm balls.
Heat the olive oil in a skillet over medium-high heat. Add the meatballs and cook for several minutes or until browned on all sides.
Add the tomatoes, wine, basil, and rosemary. Simmer gently for around 20 minutes, or until the meatballs are cooked. Season generously with salt and pepper and serve hot.

Potatoes Bravas - All I can say is wow.  I'm a potato girl and the crispness of the potatoes with the sweet and spicy sauce were to die for!! I went back for seconds and thirds of these.  However, they are fried and not very good for the waist line, that's for sure!!
POTATAS BRAVAS- crispy potatoes with a spicy sauce

3 tbsp olive oil
4 large russets peeled and cut into 1 inch cubes
2 tbsp minced onion
2 cloves garlic minced
Salt and pepper
1.5 tsp Spanish paprika
¼ tsp Tabasco sauce
¼ tsp chopped thyme
4floz ketchup
4 floz mayonnaise
Chopped parsley
8 floz olive oil for frying

The Bravas sauce
Warm the 3 tbsp olive oil and soften the onion and garlic
Turn the heat off and add the thyme, paprika and Tabasco sauce
Stir well
Transfer to a bowl and add the ketchup and mayonnaise
Season with salt and pepper

Potatoes
Sprinkle the potatoes lightly with salt and pepper
In a large skillet fry the potatoes in the 8floz olive oil until cooked through and browned.
Once cooked toss in the sauce and serve, top with chopped parsley.


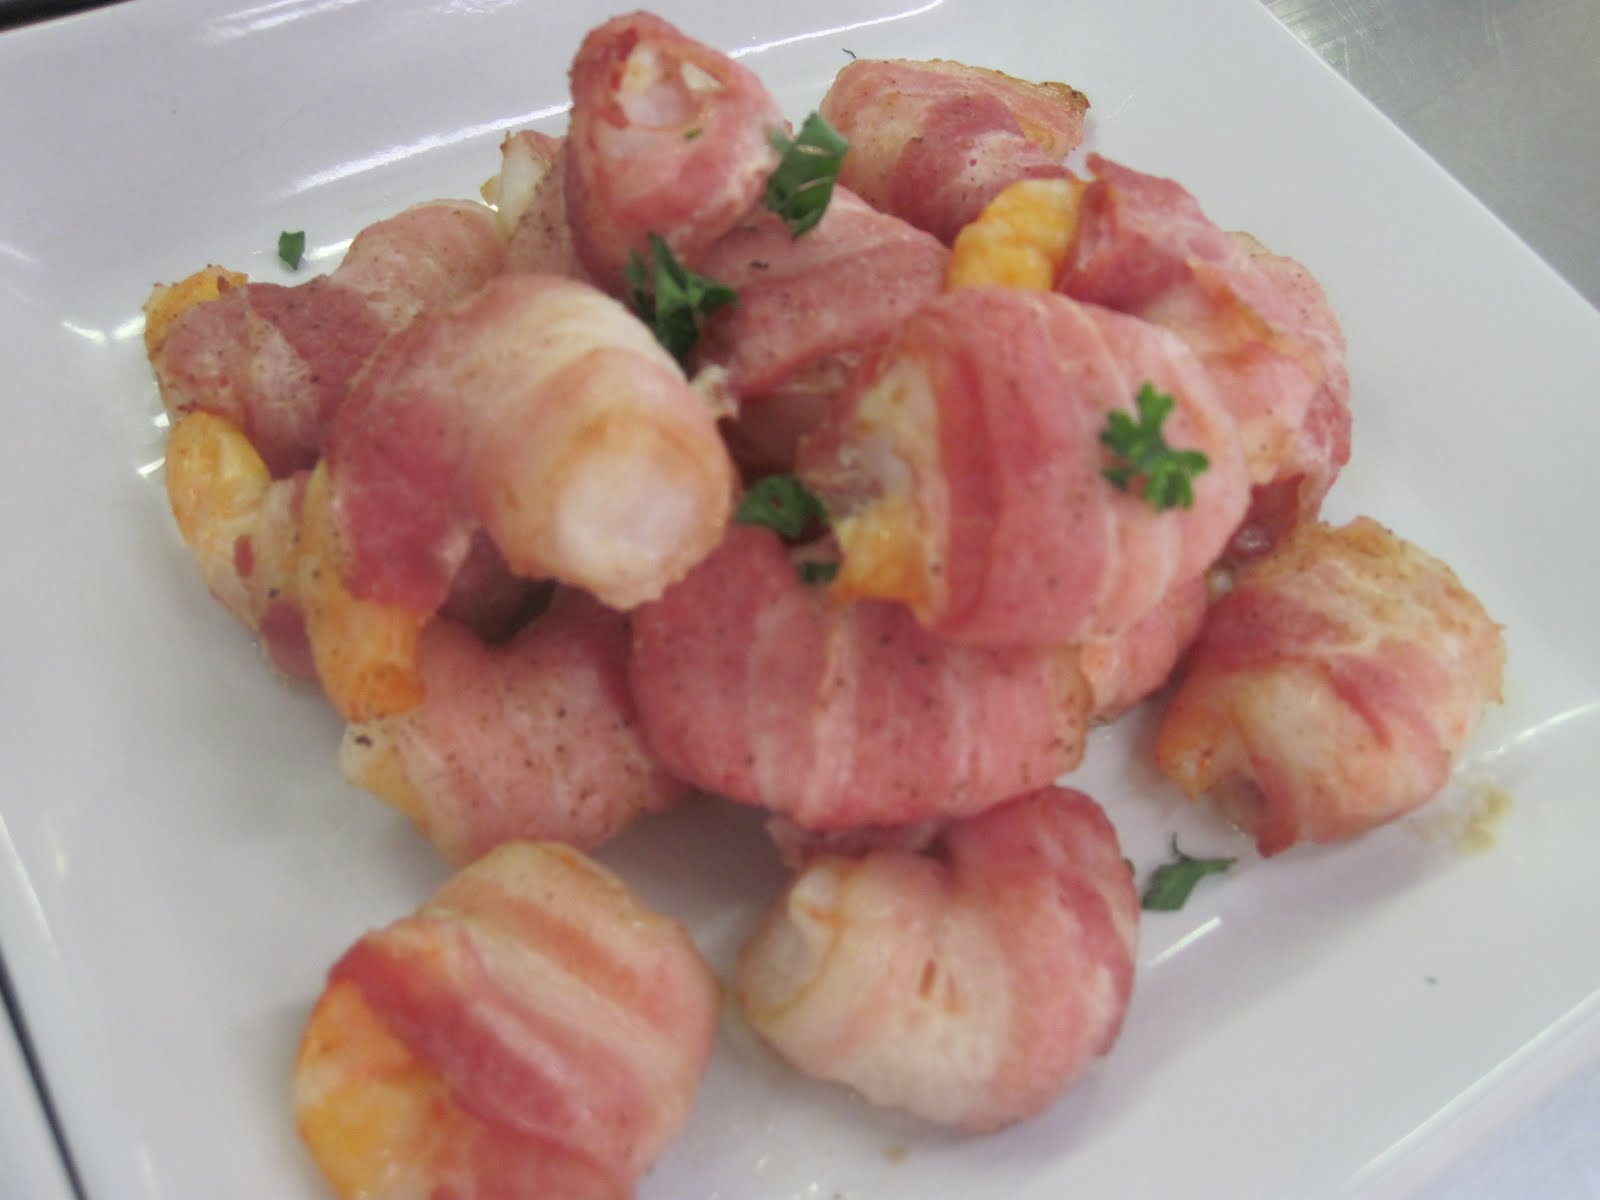
Shrimp and Bacon Brochettes - yummm.  This is shrimp wrapped in bacon with some seasonings.

Stuffed Tomatoes - Basically a tomato stuffed with egg salad.  I really enjoyed this one even if it was a bit messy!  They looked really nice but were pretty finicky when trying to scoop out the insides of the tomato.  

I will most definitely make the pork kebabs, the meatballs and sauce, the bread with mushrooms and aiolli (although with likely substitute something else for the mushrooms like carmalized onions -yumm), and the potatoes bravas again.

All in all it was a super fun experience where I really enjoyed the cooking and definitely the eating portion of it.  Also the leftovers!!  Simon had let us know to bring containers to bring leftovers home in and I was so glad I did!! (Mike was too :P ).

 My friend Sol just told me he's going to Spain at the end of the month and I'm very envious that he'll be eating tapas all the time!  Yummmmmm!

Tuesday, August 9, 2011

Bush Pies!


We went camping for a week at the end of July with my mom and her 5th wheel at Greenwater Lake.  It was a bit of an adjustment for Gray and he let us know how much he didn't want to sleep in the back bunk!  With that being said, he had a great time with Grandma and I think Grandma had a great time with Gray too!!  Mike and I would head for a walk or jog atleast once a day and I definitely miss that since we've been back to the city.  However, walking there was MANDATORY to try and burn off some calories that were consumed.  We had our annual loaded fries from the Beach Cafe and they were delicious!! But we only have them once a  year for a reason!  (okay I admit, we had them twice this year but we did do a lot of walking to make up for it!

Bush Pies was the theme of camping this year!  We had breakfast bush pies, dinner bush pies, and dessert bush pies!!!  I have pictures below of most of our creations.  The only thing I'm missing was the grilled cheese and bacon sandwich.  It looked similar to the one picture below, minus the egg.
Breakfast Bush Pie: 1 egg, crumbled bacon, Tex Mex Cheese Shreds, Salt and Pepper


Half Eaten Breakfast Bush Pie

White Enchilada's turned Bush Pie!!  We used our leftover chicken mixture from White Enchilada's and put it in a Kaiser Bun and used our round Bush Pie Maker for some fabulous results!

Mike says the White Enchilada Bush Pies were his all time favorite!

Yum! Dessert Bush Pies- Mom had sampled this recipe at a friends campsite and couldn't wait to share it with us!  Nutella, cherry pie filling, and marshmallows made this ooey gooey delicious!  Bush Pie Tip: Make sure your bread is facing the opposite direction for proper bush pie sealage!

I could've left this on for another minute to melt the marshmallows just a touch more .

Dessert Bush Pie #2!!  This was Mike's creation - he took a twist (doughnut), cut it in half, filled it with marshmallow and nutella, and toasted it.  Was yummy but the sugar glaze on the outside of the twist was super sticky and didn't toast up very good.  (cherry pie filling noted in picture was just from the knife used to cut it)


Oh bush pies, how I love you!