Wednesday, August 10, 2011

Cooking Class: Spanish Tapas

In July, Brigie and I took a cooking class through Simon's Fine Foods.  We saw it on kijiji deals, and scooped it up right away.  Basically the deal was for  2 for 1 cooking classes.  The first cooking class we chose was Spanish Tapas.  Tapas are served as small platters of food instead of large meals.  They can be an appetizer or you could have several different tapas to make up your main meal.  

The menu that Simon had made up for us was absolutely amazing.  Some of the tapas were hot, some served cold, and all served delicious.  Simon was super relaxed and very easy going, making it a lot of fun.  We had a choice of which dishes we wanted to prepare, while working in pairs, and I think there was only one dish that we didn't make (out of the possible 9!) as we ran out of time.

**All recipes below I obtained through the cooking class at Simon's Fine Foods.
 Things that I learned:

  • How to peel a tomato: After scoring the bottom of a tomato with an 'X' and cutting out the stem, place in boiling water until the skin starts to blister and then place in ice bath to stop the cooking process.
  • How to cook with fresh herbs such as basil, thyme, and rosemary.  After you've removed the fresh herb from the stalk, freeze the stalk and use it when you're making soup for extra flavor!
  • First time I've ever cooked with curry, turmeric, or coriander. 

Prosciutto wrapped Honeydew

Pork Kebabs (Pinchitos Morunos)- probably my favorite dish -  Brigie and I made these!  Simon says these are eaten all over Spain and were brought into the country from Africa.  It's funny because they actually struck me as very African Tasting!  It seriously tasted like I was very far away from home!  Transported me to some exotic vacation spot.


1 lb. lean pork, cut into small cubes
2 garlic gloves, finely chopped
2 teaspoons salt 1 teaspoon mild curry powder or pinchito spice mixture
1/2 teaspoon coriander seeds 1 teaspoon Spanish paprika
1/4 teaspoon dried thyme
Freshly ground black pepper 3 tablespoons olive oil
1 tablespoon lemon juice
Preparation
Crush the garlic with the salt in a mortar (or with the flat of a knife on a board), then work in the other ingredients.
Skewer the pork, 3-4 cubes to a small stick, and marinate them in a shallow dish with the herbs (pinchito spice, coriander, paprika, and thyme), turning so they are well coated. Leave at least a couple of hours.
Spread the pinchitos out well on a barbecue or on foil under a grill. Cook them under a high heat for about 3 minutes on each side.

*We only marinated them for about 25 minutes and cooked them in the oven instead of the grill.

Gaspacho - chilled vegetable puree soup.  I thought this dish was okay - but I'm not a huge red onion fan.  Everyone else LOVED this.  It did taste amazingly fresh though!

Bread with Mushrooms and Aiolli - this was incredible! and I don't even like mushrooms!  First time I tried sherry too, which the mushrooms were cooked in.  It really reminded me of a Port -- tasted like a very sweet wine.  I really enjoyed the crunch of the crostini and the creamy aiolli sauce (mayo mixed with garlic.)

Meatballs with a Red Wine and Fresh Herb Sauce - Brigie and I made this and I have to say they were probably the best meatballs I've ever had!  The meatballs themselves had fresh herbs too (as well as the sauce) and was absolutely amazing!!

Meatballs in tomato sauce
Ingredients 2 tablespoons of olive oil
8 oz ground beef
1 cup (2 oz) fresh white breadcrumbs 2 tablespoons grated Manchego or Parmesan cheese
1 tablespoon tomato paste
3 cloves garlic, chopped fine
2 scallions, chopped fine
2 teaspoons chopped fresh thyme
1/2 teaspoon turmeric
Salt and pepper, to taste
2 cups (16 oz) canned plum tomatoes, chopped
2 tablespoons red wine
2 teaspoons chopped fresh basil leaves
2 teaspoons chopped fresh rosemary
In a bowl, thoroughly mix together the beef, breadcrumbs, cheese, tomato paste, garlic, scallions, egg, thyme, turmeric, salt, and pepper. Using your hands, shape the mixture into 12 to 15 firm balls.
Heat the olive oil in a skillet over medium-high heat. Add the meatballs and cook for several minutes or until browned on all sides.
Add the tomatoes, wine, basil, and rosemary. Simmer gently for around 20 minutes, or until the meatballs are cooked. Season generously with salt and pepper and serve hot.

Potatoes Bravas - All I can say is wow.  I'm a potato girl and the crispness of the potatoes with the sweet and spicy sauce were to die for!! I went back for seconds and thirds of these.  However, they are fried and not very good for the waist line, that's for sure!!
POTATAS BRAVAS- crispy potatoes with a spicy sauce

3 tbsp olive oil
4 large russets peeled and cut into 1 inch cubes
2 tbsp minced onion
2 cloves garlic minced
Salt and pepper
1.5 tsp Spanish paprika
¼ tsp Tabasco sauce
¼ tsp chopped thyme
4floz ketchup
4 floz mayonnaise
Chopped parsley
8 floz olive oil for frying

The Bravas sauce
Warm the 3 tbsp olive oil and soften the onion and garlic
Turn the heat off and add the thyme, paprika and Tabasco sauce
Stir well
Transfer to a bowl and add the ketchup and mayonnaise
Season with salt and pepper

Potatoes
Sprinkle the potatoes lightly with salt and pepper
In a large skillet fry the potatoes in the 8floz olive oil until cooked through and browned.
Once cooked toss in the sauce and serve, top with chopped parsley.


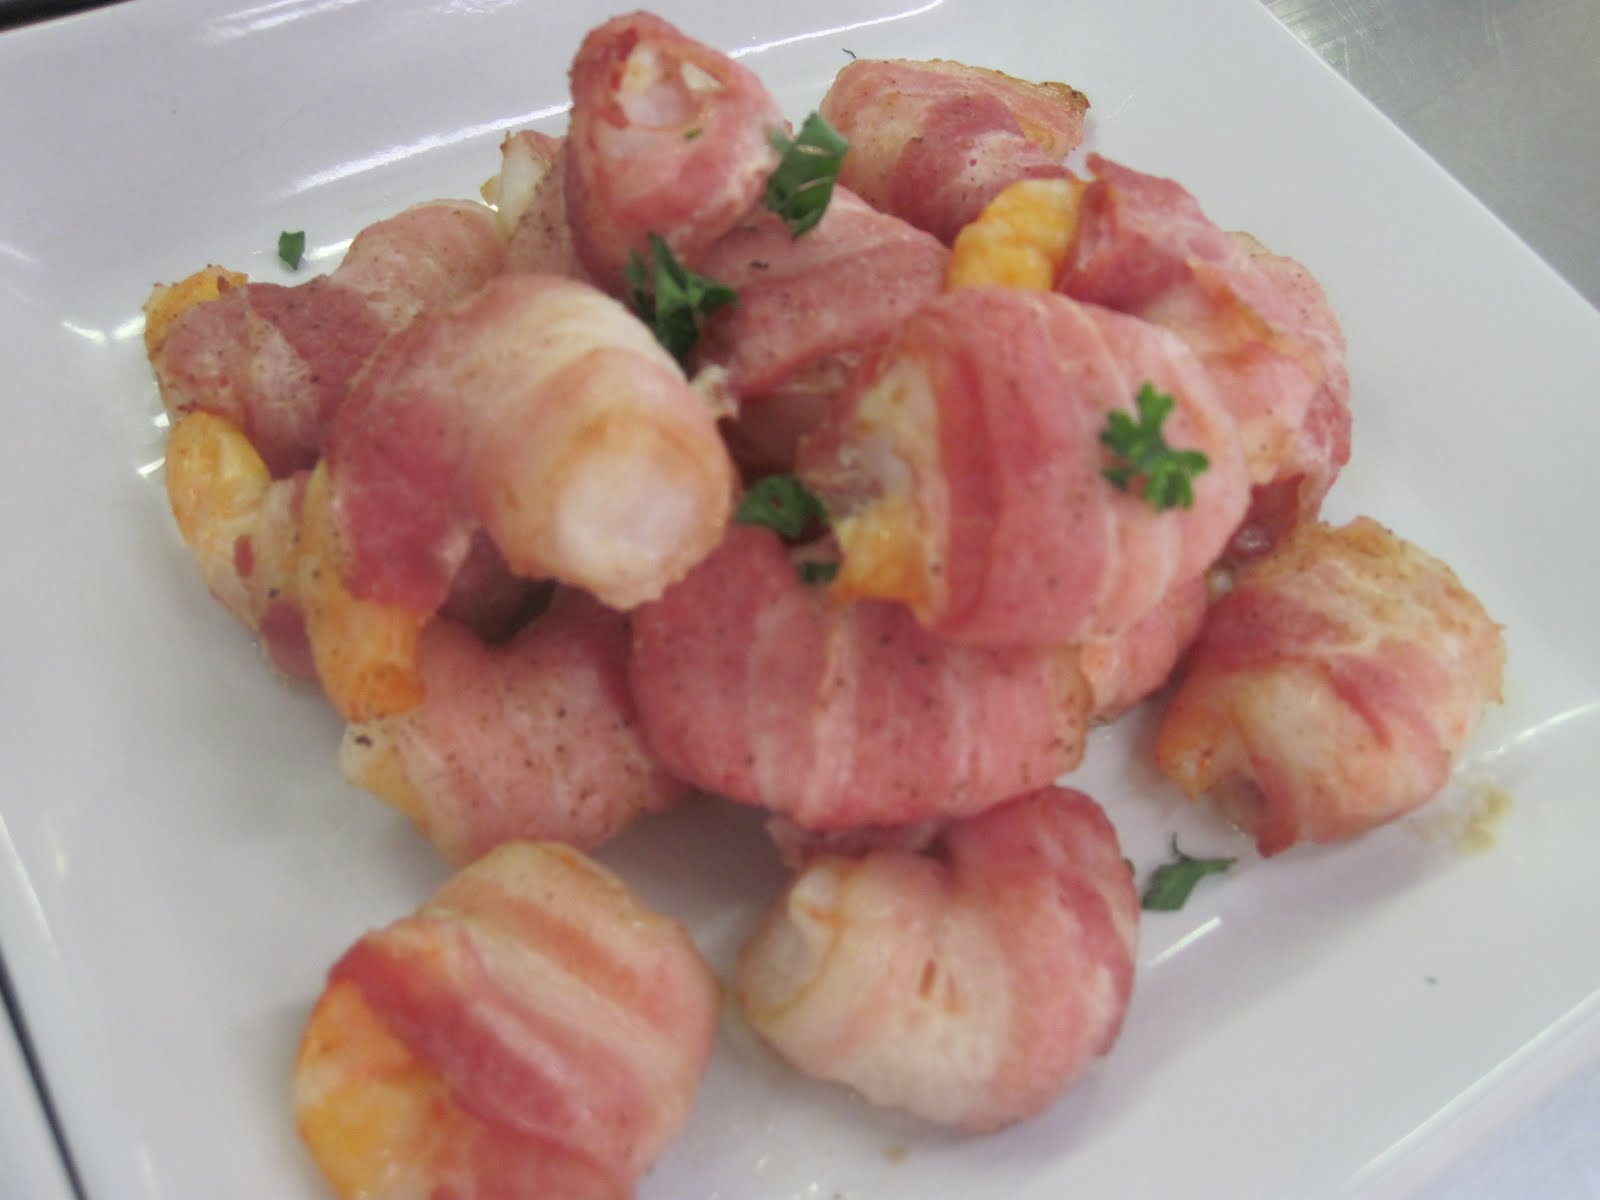
Shrimp and Bacon Brochettes - yummm.  This is shrimp wrapped in bacon with some seasonings.

Stuffed Tomatoes - Basically a tomato stuffed with egg salad.  I really enjoyed this one even if it was a bit messy!  They looked really nice but were pretty finicky when trying to scoop out the insides of the tomato.  

I will most definitely make the pork kebabs, the meatballs and sauce, the bread with mushrooms and aiolli (although with likely substitute something else for the mushrooms like carmalized onions -yumm), and the potatoes bravas again.

All in all it was a super fun experience where I really enjoyed the cooking and definitely the eating portion of it.  Also the leftovers!!  Simon had let us know to bring containers to bring leftovers home in and I was so glad I did!! (Mike was too :P ).

 My friend Sol just told me he's going to Spain at the end of the month and I'm very envious that he'll be eating tapas all the time!  Yummmmmm!

Tuesday, August 9, 2011

Bush Pies!


We went camping for a week at the end of July with my mom and her 5th wheel at Greenwater Lake.  It was a bit of an adjustment for Gray and he let us know how much he didn't want to sleep in the back bunk!  With that being said, he had a great time with Grandma and I think Grandma had a great time with Gray too!!  Mike and I would head for a walk or jog atleast once a day and I definitely miss that since we've been back to the city.  However, walking there was MANDATORY to try and burn off some calories that were consumed.  We had our annual loaded fries from the Beach Cafe and they were delicious!! But we only have them once a  year for a reason!  (okay I admit, we had them twice this year but we did do a lot of walking to make up for it!

Bush Pies was the theme of camping this year!  We had breakfast bush pies, dinner bush pies, and dessert bush pies!!!  I have pictures below of most of our creations.  The only thing I'm missing was the grilled cheese and bacon sandwich.  It looked similar to the one picture below, minus the egg.
Breakfast Bush Pie: 1 egg, crumbled bacon, Tex Mex Cheese Shreds, Salt and Pepper


Half Eaten Breakfast Bush Pie

White Enchilada's turned Bush Pie!!  We used our leftover chicken mixture from White Enchilada's and put it in a Kaiser Bun and used our round Bush Pie Maker for some fabulous results!

Mike says the White Enchilada Bush Pies were his all time favorite!

Yum! Dessert Bush Pies- Mom had sampled this recipe at a friends campsite and couldn't wait to share it with us!  Nutella, cherry pie filling, and marshmallows made this ooey gooey delicious!  Bush Pie Tip: Make sure your bread is facing the opposite direction for proper bush pie sealage!

I could've left this on for another minute to melt the marshmallows just a touch more .

Dessert Bush Pie #2!!  This was Mike's creation - he took a twist (doughnut), cut it in half, filled it with marshmallow and nutella, and toasted it.  Was yummy but the sugar glaze on the outside of the twist was super sticky and didn't toast up very good.  (cherry pie filling noted in picture was just from the knife used to cut it)


Oh bush pies, how I love you!

Thursday, July 14, 2011

Chocolate Cupcakes with Peanut Butter Buttercream Icing

Hi everyone!!
Wow, I can't believe that it's been a month since my last post!  Summer has been busy so far and has been flying by.  My little boy is 8 months old already, which just seems completely unreal.  I keep thinking I must have counted wrong and he's only 6 months old.  He's at such a fun age - he really responds to you with giggles and smiles and is developing quite a little personality.  He really likes structure and is very schedule orientated, and as long as he gets his naps on time, he is one happy monkey. He's very social - loves going to everyone and loves loves loves looking at pictures of babies.  He really enjoys reading books and flipping pages.  When he's playing on the floor, more often than not he'll crawl to either his bookshelf or his stack of books underneath his little old fashioned desk and try and figure out how to get the books open.  He also likes to do things FAST.  He likes it when I run while holding him, when daddy throws him up in the air, and being twirled around in a circle.  The faster, the better.  He's not a snuggler - he often wants to be held, but at an arms length away while he's exploring everything else.


Anyways, speaking of time flying by, my husband turned the big 3-0 last week!  I threw him a little surprise birthday party with just a few of his closest friends and family and made chocolate cupcakes with peanut butter icing.  Okay, I'm not going to lie- the cupcakes were Duncan Hines or Betty Crocker, who's to say really.. but they came from a box.  The icing though! Aye there's the rub... it took a while to find the perfect recipe but I found one.  I decided to go with a Wilton recipe, since the comments were all really good and that's who I learned my cake decorating skills from.  


You can find the recipe for Peanut Butter ButterCream Icing here.  The only change I made was I added an extra half cup peanut butter for a total of one cup!   Oh, but I did at a lot more milk to thin it down.  I just added until it was the consistency I wanted, which was probably about 10-12 Tbsps. I used my 1M Tip (large star tip) and piped the icing all around the edges and then up into the middle like an ice cream cone.  This cupcake in the picture is actually a couple days later and it had been laying on its side- so the icing is a bit smushed in places but you get the idea!  

Wednesday, June 15, 2011

Anna's Macaroni and Cheese

Hi Everyone!!
So the Real Women of Philadelphia Contest is over, and we're still waiting on the last two finalists to be announced in the dessert category, but I know it won't be me as I didn't submit any dessert ideas!  I had grand plans for a few desserts... ice cream sandwich cheesecake for one, dessert sushi for another.. but they either didn't pan out or I ran out of time!  It was fun while it lasted, and I sure enjoyed being in the 'spotlight' in the entree round last week!  Seriously, just seeing my video in the highlight reel with all those other talented ladies with amazing recipes just made me completely giddy! I forwarded the link on and posted it everywhere I could.. and I might as well post it again here!

I really received such great feedback about my recipe for meatloaf cupcakes - thank you to everyone for taking the time to pass this on to me.

I've been craving a good mac and cheese dish for awhile now, so in the spirit of Philly, I made Anna Olson's Macaroni and Cheese.  It turned out really good - very creamy!  I didn't bake it as I was running short on time (picture steaks already off the grill and a hungry husband waiting in the wings) but it was still delicious!  I'd like to make it again sometime with a breadcrumb topping -- yummmm!!  I am not that great with measuring pasta so I had a bunch of sauce left over, that I reserved and have been serving on broccoli.  I love having this little bit extra kicking around to dress up my veggies!  Anyways, you can find the recipe for Anna's Mac and Cheese here!  Enjoy!

Monday, May 30, 2011

Meatloaf Cupcakes with Potato and Cream Cheese Icing

Editors Note:  My recipe was chosen for the spotlight this week!! YAY!! http://www.realwomenofphiladel
phia.ca/post/spotlight-videos

This is my final entry in the Real Women of Philadelphia Contest! I've had a lot of fun coming up with new recipes and altering old recipes so they met the contest requirements.  I think this recipe is the one that I had the most fun with - they just looked so impressive and seriously tasted delicious!

I've tampered with quite a few different meat loaf recipes over the years and I love love love my final edition!  This recipe has brown sugar BBQ sauce in it, which adds a lot of sweet tang and moisture to the "muffins." When I was frying up my onions for the meatloaf, I cooked them at a higher heat than I usually do and they turned a delicious caramel color!  YUMMM!!  The Potato and Cream Cheese Icing took several attempts trying to get the right consistency and right flavor.  The end product was well worth the trials!  The trick is to get the potato mixture completely lump free so when you're piping through the large star tip, the lumps don't back your potato mixture up!!  A potato ricer makes this a non-issue though!  I think the part that I enjoyed the most was finishing it with the "sprinkles!" Everyone can decorate their own!  I think this would be fun for a birthday party or dinner party - something that tastes delicious, with readily available ingredients, and is a fun twist on an old classic!

Meatloaf Cupcakes with Potato and Cream Cheese Icing
2lbs lean ground beef
1 1/2 cups bread crumbs
1 cup Kraft Brown Sugar BBQ sauce
1 tbsp whipping cream
1 large onion
1 large egg
1/2 tsp + another 1/2 tsp minced garlic (divided)
3 tbsp milk
1/2 cup light Philadelphia Cream Cheese (brick)
5 medium potatoes
3 TBSP butter, divided
Salt & Pepper 
1/3 cup green onions, chopped
1/3 cup real bacon bits
1/3 cup parsley, chopped

1. Preheat oven to 450 degrees.
2. Grease muffin tin.
3. Dice onion.
4. Melt 1 TBSP butter in pan over medium heat, add diced onion and fry until onions are clear, about 5 min. 
5. While onions are frying, peel and cut up potatoes into small uniform sized pieces.  Put in large pot and add enough water to cover. Boil for about 15 minutes or until you can easily cut potatoes with a fork.
6. Add 1/2 tsp of garlic to onions and cook until garlic is fragrant, approx 1 min. and then remove from heat.
7. Put ground beef in large mixing bowl.
8. Beat egg. Add 1 tbsp cream to egg and whisk until blended.
9. Add egg mixture, bread crumbs, BBQ sauce, 1/2 tsp each of salt and pepper, and all of the cooked onion to the ground beef and mix thoroughly. (using your hands to mix is quickest and easiest!)
10. Roll ground beef mixture into 12 balls large enough to completely fill each muffin mold. Pat balls down to make them smooth on top.
11. Bake at 450 degrees Fahrenheit for 20 minutes.
12. Once potatoes are finished, drain water and add to a mixing bowl.  Add remaining 2 TBSP butter, 3 TBSP milk, 1/2 cup cream cheese, remaining 1/2 tsp garlic, and salt and pepper to taste.  Mix on medium high until smooth and all the lumps are gone.  **Use a potato ricer before adding the potatoes to the mixing bowl for an extra smooth finish!** 
13. Insert a large star piping tip into a piping bag (or snip the corner off a disposable zippered bag), add your Philly mashed potatoes, and squeeze all the potatoes down towards your tip and remove as much air as possible from the bag.  Bunch excess bag together above potatoes and keep this tightly pinched so potato mixture will go out the tip, not up into the bag.  (If you don't have a star tip, no problem, just cut the corner off of a zippered bag and use the same way -  it just won't have the fancy wavy edges).
14. Once meatloaf cupcakes are cooked, loosen around edges of the meatloaf with a knife to remove easier.  Place these on a plate lined with paper towel.
15. Starting around the edges and working your way into the middle, apply firm pressure to your piping bag to squeeze potatoes out the tip and spiral the potato mixture up like an ice cream cone. Once you've spiralled the potato mixture to a peak in the middle, release pressure and lift up. Place on serving plate. Repeat until all meatloaf cupcakes are "iced" with the mashed potatoes.
16. Sprinkle with green onions, bacon bits and parlsey.
17. Serve immediately while still hot!


Sunday, May 22, 2011

Quick Broccoli Salad

I just submitted my recipe for Quick Broccoli Salad to the Real Women of Philadelphia contest!  I make a fool of myself yet again on camera as I video myself preparing this recipe.  I think Mike's favorite part is the 'shake shake shake!'

This is a remake of my moms Broccoli Salad, by adding dill cream cheese, cherry tomatoes, and goat cheese! YUMM!  It is seriously delicious, and by using pre-packaged ingredients like already washed and cut up broccoli and real bacon bits, it speeds up the prep time to five minutes!  I like to serve this as a side dish with anything BBQ'd: steak, pork chops, burgers, hot dogs, you name it!

Quick Broccoli Salad

4 cups broccoli, chopped into bite size pieces
1/4 cup Dill Philadelphia Cream Cheese
1/4 cup Kraft Coleslaw Dressing
1/3 cup chopped bacon (ready made)
1/3 cup goat cheese
1/2 cup cherry tomatoes

1. Soften cream cheese in microwave safe bowl - about 20 seconds.
2. Mix together cream cheese and coleslaw dressing.
3. Wash broccoli and tomatoes and add to a large bowl that has a lid.
4. Top with bacon and dressing.
5. Roughly chop the goat cheese and add on top of broccoli mixture.
6. Stir to spread it around.
7. Cover with lid, ensuring lid is on secure and shake until well mixed.
8. Serve.


Friday, May 6, 2011

Don't Go Breakin My: Chocolate Strawberry Tart

First off, I have to say WOW.  This is possibly one of the most delicious desserts I've made yet.  It's also sinfully bad for you, made up of cookies, sugar, butter, cream, and chocolate chips... but as Mike pointed out after we polished off a delectable slice each, strawberries are fruit and fruit is healthy, right?

The base layer is a crunchy delight of oreo cookie crumbs, mixed with sugar and butter and baked until crisp (and I don't mean burnt to a..), filled with a cream infused melted chocolate chip layer, all topped off with fresh, juicy strawberries that leave such a sweet after taste!  The recipe actually called for raspberries, which, in my opinion, would be better, but I had strawberries so that's what I used!

It took all the restraint and willpower I had to refrain from gorging down the rest of the tart... or atleast just one more piece.  I could have 'atleast just one more pieced' myself to a chocolate tart coma, but I would have been in a very happy place.  You need extra calories when you're breastfeeding, right?

You can find the recipe from Martha Stewart's website for this delish dessert here: Chocolate-Raspberry Tart.  Changes that I made: I didn't use a food processor as I used oreo baking crumbs instead of cookies.  I used a little over 2 cups as I just kept adding to the butter it called for, until it looked about right and would cover the tart pan.  Oh, and I don't have a fancy tart pan with removable base (or a tart pan at all for that matter) so I just used my springform pan.  It doesn't look as pretty but works just the same.  (Note to self, add to wishlist).  And I followed what the comments suggested and added my berries before it set.  Oh and I used strawberries instead of raspberries, but I think that is fairly obvious!

Okay, now that Mike is gone to hockey (yes, it is May and he's still playing hockey), I'm gonna sneak back in the fridge and grab my second slice that has been whispering my name for the past hour.  (Note to self: wash face after -- chocolate smeared all around my mouth is always my tell.)

Side Note:  I have always thought the word 'decadent' referred to a particularly rich, most likely chocolaty, sinfully delicious dessert.  Turns out, it doesn't.  After much searching, I find that it's related more to behaviour  than to desserts.  According to dictionary.com, decadent means characterized by decadence, which in turn means:
 1. the act or process of falling into an inferior condition or state; deterioration; decay: Some historians hold that the fall of Rome can be attributed to internal decadence.
2.
moral degeneration or decay; turpitude.
3.
unrestrained or excessive self-indulgence.

** I think we'll go with the last one!!  It's time for me to exhibit some decadence -- gotta go!