Saturday, April 30, 2011

Real Women of Philadelphia: Entrees

I didn't submit a recipe for last weeks round of side dishes for the Real Women of Philadelphia Competition, mostly because I was finishing up my cake decorating course and preparing for Easter lunch here.  Perhaps those are just excuses and the real reason was I didn't want to take the time to create a unique and tasty side.  I tried making creamed quinoa, which ended up being okay, but definitely not competition worthy.

Maybe I was saving it all up for entree week!  I re-vamped my White Enchilada's recipe and added cream cheese to the mix and seriously SERIOUSLY it turned out awesome!  The creaminess really balanced well with the spiciness from the taco seasoning.  This is definitely going into my usual rotation of recipes!

I just filmed another creation but I have to do a bunch of editing on it to piece everything together so we'll see if I get it done in time for tomorrow's deadline!  If not, I have it ready and waiting to go for the second round of entrees in a months time!  What is it you ask?? Shhh.. that's a secret- I wouldn't want to give my competition an advantage! :-P
 
This video is pretty long - a whopping 9 minutes!! But I didn't really feel like I could cut much out as it was showing the steps to the recipe or I was busy jibber-jabbering! I think my first two videos were better than this one - possible the length was a contributing factor!

Monday, April 25, 2011

Scalloped Potatoes and Nalysnyky

We hosted Easter lunch this year, so I was able to cook for my family!  I really enjoyed planning the menu and finding the recipes that I was going to use.  I did what I consider a very traditional Easter meal of ham and scalloped potatoes.  I found a new scalloped potatoes recipe from Canadian Living that everyone seemed to like. I really liked the bread crumb topping - yumm!  We dove in too fast to take a 'before' pic, so here's an 'after' picture!  You can find the recipe here.  I think I ended up going with this recipe instead of others because it called for cider vinegar, which I had sitting in my pantry unopened for who knows how long!  I also used my Pampered Chef Mandolin to slice all the potatoes and onions and every time I use it I am amazed at how fast and easy it is!!


I tried a new recipe "Nalysnyky"(pronounced NAL-YES-Nah-Keh) for lunch yesterday too.  These are basically cheese filled crepes and they're smothered in butter.  Very rich, but you gotta try one or two :-).  I found the recipe for the Nalysnyky online but tweaked it to be my own.  I used the basic crepe recipe but changed the filling contents.  The original recipe can be found here, and I will post what I used for filling (in the Real Women of Philly way of course!!)

Nalysnyky with Dill Philly Cream Cheese
4 eggs
1 cup milk
1/2 cup water
1 cup flour
1/2 tsp salt
Beat eggs one at a time, then add the rest of the ingredients and mix until all the lumps are gone. (This'll make a very thin mixture).  Pour a ladle full into a greased pan - I sprayed pam in between each crepe.  Fry over medium heat for about a minute each.  Makes 8-12.  

Cheese filling
1/2 cup dill Philadelphia Cream cheese
1 cup cottage cheese
1 TBSP fresh dill

 Blend above in your mixer until well mixed.  Spoon two spoonfuls onto each crepe and spread to cover completely.  Roll the crepe up and slice it in half.  Line a casserole dish with tin foil and spoon a couple TBSP of melted butter in the bottom and layer the filled crepes on top, making sure to butter in between layers.  Bake at 350 for 30 min and then serve immediately.  

Sol's Salmon

This winter we took a trip to Hawaii with our friends Sol and Brent.  The beach house we had rented had a charcoal barbecue and we cooked on it as often as we could.  Which, wasn't as often as we liked as it was such a production just to get it ready for cooking!  Mike's friend Jason (who he worked with when he was on a Hawaii project a few years ago) came over one evening for supper, bringing with him enough food to feed an army, including two huge fillets of salmon.  I was feeding Gray, so I'm not sure who prepared the salmon but I'm crediting Sol since he told me how he usually prepares it at home.  It was some of the most delicious salmon I've ever had!!  

I was at the grocery store the other day and saw some salmon marked down 30% for quick resale.  Since I didn't have anything on the menu for that nights supper, I pounced on it!  Using Sol's directions, I prepared it on the bbq and it turned out absolutely amazing.  Even the leftovers the next day were amazingly moist and juicy.  It was a real treat!  We served it with quinoa and broccoli!  YUMM!

Double portion of salmon - yummm!
Sol's Salmon
1 large salmon
olive oil
salt and pepper

Drizzle a little bit of olive oil over entire length of fillet, front and back.  Season with salt and pepper.  BBQ.  haha. It's seriously that easy.  I grilled it on the top rack, so it was away from the flame.  I cut it into a few pieces so flipping it would be easier.  I cooked it on med low and turned it once the edges started to look done - flaky and light pink, about six minutes.  I "squeezed" some lemon juice over the fillets while they were cooking too.  About six minutes on the other side as well and then I let it rest on a plate, covered with tin foil for about 10 minutes.  Mostly because Mike was in the middle of bathing Gray - haha.  But when you let meat rest before you cut into it, it lets the juices redistribute throughout so we'll say the same thing happens with salmon! :-) 

Ice Cream Sandwich Cheesecake

Ice Cream Sandwich Cheesecake
Okay, so in line with the Philly contest, I've been trying to come up with all sorts of cream cheese recipes and have been having so much fun!! My most interesting creation so far has definitely been my Ice Cream Sandwich Cheesecake.  Now I LOOOOOVE ice cream sandwiches... and I also love cheesecake, so it seemed only natural to combine the two.  I did a quick google search only to find that there are no recipes out there for this!! I couldn't believe my luck!!  So, with much skepticism from Mike, I embarked on my ice cream sandwich cheesecake.  (I had originally named it ice cream cheese sandwich, but because the words can be separated into ice cream / cheese sandwich, I decided that sounded utterly disgusting and confusing, therefore the new name had emerged!).  Now my biggest disappointment with this recipe is that it takes over an hour to set, and therefore does not qualify for the Real Women of Philadelphia Contest (must be prepared and ready to serve in an hour or less).  However, I consider this a victory since it tastes so absolutely amazing!!

Ice Cream Sandwich Cheesecake
1 brick light cream cheese
3 cups ice cream (this is 1/2 a 1.5L (aka 6 cup) container) vanilla ice cream -- or whatever flavor you want!!
1/2 cup icing sugar *you can adjust this to your desired sweetness)
1 package brownie mix

(yes with these 4 little ingredients, you get something absolutely amazing and heavenly!!)

Okay, so first, mix up your brownie mix according to package directions.  Cut a circle of parchment paper to line the bottom of your spring form pan. Spray pam on spring form pan, top with your parchment circle and then spray more pam on top of the parchment paper.  Pour HALF of mixture into parchment lined spring form pan and bake at 350 degrees for 20 minutes, or until a toothpick inserted into brownie comes out with a few crumbs sticking to it.  Set on wire rack and let cool for 10 minutes.  Remove sides from pan and gently slide the brownie layer onto the cooling rack.  Put your pan back together, grease the bottom again (don't need parchment for this layer) and pour the remaining half of your brownie batter in.  Bake at 350 degrees for 20 minutes and cool on wire rack until completely cooled.  (After 10 minutes, you can pop this in the freezer to cool it down quicker)

**** If you have two springform pans you can of course bake this at the same time!!

While the 2nd layer is baking, in mixer, whip together your room temperature brick cream cheese and icing sugar until smooth.  Add your melted ice cream to this and blend till completed mixed.

Once brownie layers have completely cooled, pour ice cream mixture over bottom layer in the spring form pan and put in the freezer to set.  After two hours (longer if not using a deep freeze), the ice cream will be mostly frozen and you can gently peel off the parchment from your remaining brownie layer and place peeled side down on your ice cream layer.  Freeze for atleast another hour or two until completely set.  (Overnight is optimum).  Take out a few minutes before serving to allow for easier slicing.

I hope you enjoy my recipe!  Mike was surprised that it turned out for the sole fact that when you refreeze melted ice cream, it's not very good.  But this was soooo good!  I may invest in another spring form pan just to save some time!  I plan on playing around with this recipe a little bit to try and make it into smaller portions so it'll freeze faster and hopefully qualify for the contest!!

Friday, April 22, 2011

Cake Decorating Part 4

We had our final cake decorating class last night!  I'm sad that it's over as it gave me something to prepare for, think about, and get out of the house to do!  I'm toying with the idea of taking another cake decorating class (there's two more that Michael's runs: flower decorating and fondant).  I don't know if I'm up to the time commitment though, as the weather is getting warmer and I'll be wanting to spend more time outside and less time heating up my house with the oven!

This was our final project week, so we came with a cake already iced.  I used some icing that my FIL gave me but I should have thinned it before I spread it on.  The taste of the icing was delicious (I much prefer it to the stuff I make with the almond flavoring) but I had a tough time trying to smooth out the wrinkles with parchment after.  I think if I would have just left it white instead of coloring it, it would have been less noticeable.  When I layed the parchment on top to smooth it, it just stuck to it and made little pointy peaks when I tried to remove it.

Things I learned this week:

  • Writing and printing with icing
  • Making ROSES!! (yay!!)  
Making the roses were pretty tough.  It took a while before I got used to the technique but my icing kept cracking.  I either wasn't spinning the flower nail fast enough or wasn't putting enough pressure on the bag and not getting enough icing out.  Out of the 12 I attempted, I had enough to decorate my cake with!  Six turned out pretty good, which is what I needed for my cake, and actually there was a couple other ones that were 'runner ups'.  Camille's roses looked amazing though - she got the hang of it super quick!  She used a hot pink that really stood out compared to my boring white.


Since we've been eating so much cake lately (besides all my baking and cake decorating we had my mom's 50th birthday party on the weekend), I decided I needed to make this for someone instead.  Last time we had people over to have cake (after the 2nd class), they really didn't eat it as I was hoping for.  Okay, yes they ate, but I was left with a half a cake left over that Mike and I inevitable pigged out on.  So for this cake I used my brains and thought "Now who would eat the cake?" and the answer came to me immediately!! "Pregnant people eat cake!!!"  I have a few friends that are pregnant right now so I thought I'd make this for them!  Amanda and Robin came over and we embarrassingly polished it off quite handily. 


There's a lot of things that I wish I would've done differently with the cake but all in all I'm happy with the result.  I wish I would've left the base icing white though and colored the roses instead of the other way around.   


Tuesday, April 19, 2011

Cake Decorating Part 3


Last week we had to make two batches of icing and color each one a different color.  We also had to make six cupcakes to decorate.  The other week when I made my cake, I just made my cupcakes with the rest of the cake batter!  Saved some time!  I reallllly enjoyed last week, decorating cupcakes is so easy.  You just have to have the right tip on your piping bag and you can make those swirly cupcake tops like you see in the cupcake shops!  EASY!  The flowers were really fun to make too!  I hope I remember how to do this for this week, as it's our final project.  We have to come with our cake already iced, so we'll see how that goes!

Star Flower
Shaggy Mum
Things I learned this week:
  • how to fill a cupcake (filled it with vanilla pudding, yum)
  • how to make the pretty swirly top
  • how to make leaves
  • how to make a shell border
  • how to make star flowers
  • how to make pompom flowers
  • how to make shaggy mums (takes like 1/3 cup icing per cupcake!)
Miraculously, I didn't spend any more money to ad to my budget.  Bonus!  Clean up after still took like 45 minutes, but atleast I was able to get my piping bags clean on the first try this time.  Last week I rewashed them like three times, which really added to the total clean up time!!  This was my favorite week yet! 
PomPom Flower is middle right with two shades of blue icing on top of pink swirl
                                                 
My FIL gave me a bunch of icing, shortening, icing sugar, meringue powder, and piping gel!!  So that will greatly decrease the cost of cake decorating in the future!!  Up until now, I've only had to buy one 3-cup package of shortening, and it's lasted the whole course!! (plus the tub of icing I had to buy at the start).  Maybe I should be practicing more??

Friday, April 15, 2011

Real Women of Philadelphia

I've really dived into trying new things lately.  Cake decorating was the first step - I'm really not a baker, but I'm having fun.  And this is the next thing!!

Last week I saw an ad on the Food Network, advertising a cooking competition for Philadelphia Cream Cheese called the Real Women of Philadelphia.  Now, if you only looked in my food container drawer, you'd see about 18 empty Philly cream cheese containers, stacked up and ready to be re-used.  (Perfect size for storing unused icing and popping it in the freezer, BTW).  So this contest is right up my ally.  EXCEPT for the fact that I have to video myself making the recipe.  I'm not very confident in front of the camera but even though I was nervous, I decided to give it a shot!  I really had fun this week trying to think of recipes to make for the contest.  

This is week 1, which is focusing on appetizers.  There will also be a week of side dishes, main dishes, and desserts, and then they repeat the categories again for one additional week each.  Confused?  My mommy brain has been in full force for the last five months (sleep deprivation??) and one of my biggest problems is word finding.  I can sit there knowing what I wanna say, but to get the words to come out is next to impossible some times!!  So this is a hurdle that I have to try and overcome in the next few weeks, but hopefully as I become more comfortable in front of the camera, I'll get better.  The prize is $20,000, among some other exciting points, but to be honest, I'm just happy to be trying something new.  I don't expect to be chosen as a finalist, so I'm just having fun and pushing my comfort zone! (my videos are floating around on the internet!! yipes!)

So this week, I adapted a recipe that my friend Camille introduced to me a few months ago.  Yummy and delicious Bacon Wrapped Stuffing.  I added cream cheese and green onions and I'm SOOOO happy with the result.  According to Company's Coming, you have to have two different ingredients or amounts to be able to claim a recipe is your own, and I added two to this one!  I'll reluctantly post the video.. against my better judgement... just to keep pushing that comfort zone!!  I sound like an idiot with some of the things I say in these videos (ie philly chili dip video - "that way when it comes out of the oven, it'll be piping hot" yep.. you heard me right, I said that) and there's things I wanted to add in dialogue but totally forgot. haha, lets just laugh this one off, ok?

Bacon Wrapped Stuffing
1/2cup(s)Philadelphia Brick Cream Cheese
1pkg store bought stuffing, prepared
1/3cup(s)green onions, chopped
1pound(s)bacon, thinly sliced
3sprigs fresh parsley for garnish (optional)

Put prepared stuffing in a large bowl.
Cut the bacon slices in half, crosswise. 
Add 1/2 cup Philadelphia Cream Cheese and 1/3 cup chopped green onions to the stuffing.
Mix everything together, using your hands!
Roll out a mini-meatball sized stuffing ball. Make sure this is bite sized!
Wrap the bacon slice around the stuffing ball, giving it a half turn while wrapping, to cover as much stuffing as possible. Secure with a toothpick.
Place on a rack over an aluminum foil lined baking sheet.
Repeat until all of the stuffing and bacon is used up.
Bake at 425 degrees Fahrenheit for 20 minutes, or until bacon is cooked to your preference.
Transfer the cooked bacon wrapped stuffing to a plate lined with paper towel to absorb any extra grease.
Transfer to a platter and serve! Garnish with parlsey (optional).

I also submitted a revised version of my Nat-cho Chili Dip.  I added 1/4 tsp Chipotle Chili Spice to the cream cheese before layering, and used Kraft 4-Cheese Italiano Cheese Shreds to top it off. I called this one Philly Chili Dip. Turned out amazing!!   I suppose I might as well post the video for that one as well..... Don't be too critical guys!!


Monday, April 11, 2011

Broccoli and Cheese Soup

Yay-- I just updated my settings to the new blog editor so hopefully I'll have better luck uploading some pics.  For some reason, it would flip some of my pics sideways (see cake decorating part 2 picture 1 for a prime example).  I'm hoping I will no longer have this problem!!

Okay so I just have to share this.  Last night my son slept EIGHT HOURS IN A ROW!!!! From 9 till 5! Fricken unbelievable!!  The extra sleep was definitely appreciated as I've been fighting off a cold for a couple days now and the rest definitely can't hurt!! Which leads me to this post -- what's better than soup when you're feeling down!

One of my favorite soups of all time is broccoli and cheese soup!  I've made several variations of this before, but this latest one is quick and easy.  I made it a couple weeks ago when my in-laws were up.  I had planned on BBQing burgers but our BBQ was stuck in the shed with a bunch of ice blocking the doors from opening.  So I improvised and made up a quick pot of soup.  My FIL informed me after he ate lunch that he really does not like broccoli, but he'd eat it any day if it always tasted like that!  (I'd say that was a definite HIT!)

Broccoli and Cheese Soup
4 cups broccoli florets, cut into small bite size pieces
1 grated carrot
1/2 onion, chopped
just enough water to cover

Boil above till broccoli very tender.  Mash everything with a  potato masher.  Then add:

1 can cream of chicken soup
2 TBSP fresh dill, or to taste
Pepper (no salt as I didn't use reduced sodium cream of chicken soup)

Whisk this all together in the pot.  Let simmer for about 10 minutes till everything's piping hot.  Then add:

1/3 cup Maclarens Imperial Sharp Cold Pack Cheddar, broken up into pieces so it melts faster.

Serve.  Top with grated cheese. yumm

*If you want a thicker soup, fry up the onions separately in a 1/3 cup butter, then add 1/3 cup flour and whisk together.  Cook for 2 minutes whisking constantly, and then slowly whisk your soup into this.  I just add crackers to thicken it up in the bowl - saves time and effort!

Saturday, April 9, 2011

Cake Decorating Part 2

For some reason it won't allow me to post
the pic right side up! 
I had my second cake decorating class on Thursday night and had a blast! We brought a cake and the icing already made. Thank goodness for my cake caddy, otherwise it would have been a real pain trying to haul it there and back!

In this class we learned and practiced:
  • how to do circles (haha, yes, there's a trick to doing circles), and how to drag the circles to make designs such as hearts or in this case, the cupcake bottom on my design.
  • how to cut a cake in half perfectly (use a cake leveler, which I now bought)
  • how to ice the middle of a cake
  • how to ice the top and sides of the cake and smooth out the design
  • how to transfer a design with icing gel. You trace the design on parchment paper with the gel in a piping bag and the pattern underneath!

I really enjoyed icing and decorating the cake in this class but I felt really really rushed. Like I didn't feel I had enough time to smooth out my icing properly, and then it has to set for 15 minutes (which it didn't have enough time to do), and then I had extra work to try and smooth it and I was rushing so I kept jamming the spatula into the edges, making it look really messy. I'm 75% happy with the result, but just know I could've done so much better if time would have permitted!!


You can see where I gouged out the edge all along here! It was smooth at one point. Also, the white beads around the bottom I piped on in the last 45 seconds of class! So they're not even but I think the cake looked a lot better with a little bit more detail!

Updated Cost List:
Cake Leveler ($5.49 reg price) $4.40
Piping gel ($5.99 reg price) $3.59
Total = $74.05

White "Enchilada's"

I have my girlfriends shower today. Last night I
was making up a batch of Broccoli and Chicken
Divan , and decided to cook up a bunch of extra chicken meat for our supper too. Since we just had this not long ago, I didn't want to make the same thing for us, so I decided to be inventive. So I decided to look in my pantry, see what I had and get cooking.

I saw tortilla shells so I'm thinking I'll make some kind of taco style thing. Check my supply, yep, taco seasoning in stock. Because of the white chicken meat and white tortilla shells, I'm inspired and decide to add everything else white!! So I add sour cream to make the sauce. Then I'm thinking that I need to mix more in to give it more filling and more staying power. Digging through my pantry I come across white kidney beans -- perfect!!! Okay, okay.. need a binding
starch in the mix...... rice of course!! I really wish I would have had some type of pure white cheese on hand to complete the effect, but they still tasted delicious.

White "Enchilada's"
3 cups cubed skinless boneless chicken breasts
1 can white kidney beans, rinsed
2 cups sour cream
1 cup rice, uncooked
1 pkg taco seasoning
8 flour tortilla's
1 cup grated cheese to top

In large, deep skillet, cook chicken with some italian
salad dressing (I always do this instead of adding oil when I'm cooking chicken on the stovetop!) until thoroughly cooked and no
pink left inside, about 15 minutes. While this is cooking, cook your rice according to package directions. Add sour cream, taco seasoning and white beans to chicken mixture. Once rice is cooked, add to chicken mixture and stir. Grease 9x13 dish (or can use two square dishes and freeze one for later!). Heat tortilla's in the microwave for 25 seconds so they are more flexible and less likely to break. Fill tortilla with chicken mixture, roll, and place in dish seam side down. After doing this for all 8 tortilla shells, top with grated cheese and bake in 400 degree oven for 10 minutes, until cheese is melted nicely!

*white cheese options to grate on top : mozzarella, white cheddar, fontina, or gruyere to name a few!!

Wednesday, April 6, 2011

Cake Decorating Part 1 & Butter Cream Icing

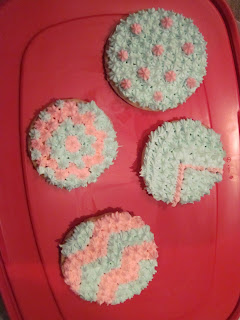
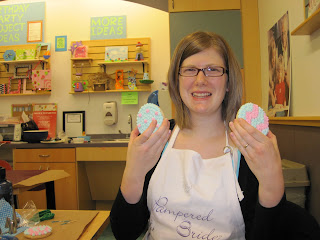
So I've been cooped up all winter and needed to get out and do something, so when Camille and her sister-in-law to be (also named Camille) mentioned this cake decorating class, I jumped on the bandwagon!! It's through Michaels and is four 2 hour classes. We had our first class last night and the two hours flew by. I couldn't believe it was time to go home and I had only decorated four cookies!

Things that I learned:
  • How to pipe stars
  • How to color icing
  • Use 'Bake Easy' non-stick spray instead of Pam to make sure that your cake pops out with no crumbs. (makes a difference when icing a chocolate cake with white icing!)
  • Use meringue powder in your icing so that it'll harden and be easy to touch up after it's dried.
  • How thick or thin to make the icing depending on what you wanna do with it!
  • Let your cake sit exactly 10 minutes before popping it out of the pan after it's baked.
I'm kinda worried that this is going to get expensive though.
Here's a list of what I've spent so far:
Class tuition 50% off plus another $5 off at the till = $18
Wilton basics starter kit (Reg price $49.99 + 50% off coupon) $24.99
Wilton 12 icing colors (Reg price $21.99 + 50% off coupon) $10.99
Small tub decorator icing (Reg price 5.99 + 25% off coupon) $4.50
Meringue Powder (Reg price $8.49 + 40% off coupon) $5.09
plus tax = $66.06

Plus I made 2 dozen cookies to decorate and ran out of sugar.
There's a lot more things that I want to buy, but I'm going to check with my FIL first to see what extra things he has, to save me a couple of bucks.

Things on my to buy list:
Cake leveler, turntable, cake boards, some good quality cake pans, piping gel, sifter, angled spatula, tool box, and I think the list will keep growing!

I have my next class tomorrow night and I have to bake a cake and whip up a batch of the butter cream icing, and make some of it thick and some of it medium consistency.

Class Butter Cream Icing (stiff consistency)
1 cup solid white vegetable shortening
1 tsp flavor (vanilla, almond, or butter) (make sure they're clear)
7-8 tsps milk or water
1 lb (4 cups) icing sugar
1 TBSP wilton meringue powder
pinch of salt (dissolve in water first before mixing )

Cream shortening, flavoring and water. Sift icing sugar. Add dry ingredients and mix on medium speed until all ingredients have been thoroughly mixed together. Blend an additional minure or so, until creamy. Makes 2 1/2 cups.


Sunday, April 3, 2011

Banana Chocolate Chip Muffins

This is another recipe I got from the 'Bun in the Oven' Shower. Camille made these and they are some of the best banana muffins I've ever had! They use apple sauce instead of oil and are so light and fluffy. My FIL was helping me in the kitchen today, and for those of you who don't know, he is a baker!! He gave me lots of tips on mixing, creaming sugar and eggs, baking and some really fun ways to fill the muffin tin. I made a mess but had a ton of fun. Camille and her fiance popped in and got to witness Barry flinging the batter into the paper cups in the muffin pan and then my attempt at doing the same. I did end up getting the hang of it after a while!! His biggest tip was to not be afraid to work with my hands and get dirty!

I'm going to be taking a cake decorating course, so he also showed me how to pipe the batter into the cups, just to practice! I'll be sure to post my homework for everyone to see. The course starts this week!

I made a double batch, one batch for my girlfriends shower on the weekend and one batch for me! My freezer is full and I love it.

Banana Chocolate Chip Muffins
1 1/2 cups white sugar
3 eggs
1 cup applesauce
2 cups flour
2 tsp baking soda
1/2 tsp salt
2 tsp cinnamon
2 cups mashed bananas
1/2 cup chocolate chips or however much you want! (optional)

Grease 2 muffin tins (skip this step if you're using paper liners). Beat together sugar and eggs until creamy. Mix in apple sauce. In a separate bowl, mix flour, baking soda, salt, and cinnamon. Add slowly to creamed mixture. Mix in mashed bananas and chocolate chips if you want. Pour (or fling if you're so inclined) into muffin tins or paper liners and bake at 350 degrees for 20-25 minutes. Makes 2 dozen.

To tell if they are done, gently press down on the muffin top and if it springs back up, they're ready! If they don't spring, they need more time.

I've never actually creamed the sugar and eggs for as long as I was supposed to EVER, but my FIL showed me how to tell when it's ready - you taste the mixture and if you can taste the grainy sugar, it's not ready yet. This will take less than 10 minutes. Don't over beat or else you'll break down the sugar.

Chicken and Broccoli Divan

A couple of my girlfriends hosted a 'Bun in the Oven' Shower for me before my son was born. It was fantastic as they had organized for everyone to bring a dish to pop in the freezer and include the recipe. It was the absolute BEST thing, as after Gray was born the last thing I had time/wanted to do was prepare meals. One of my favorites was Daryl's contribution of Chicken and Broccoli Divan. I made this the other day and it was so easy and delicious. Since I made it, both my mom and my MIL have made it, with rave reviews.

I doubled the recipe as I always feel the need to cook as if a football team is coming over for supper. I used one can of cream of chicken and one can of cream of broccoli and it was delicious. My mom used two cream of mushroom and said it was too strong of a mushroom flavor. You can really put whichever soup you want, depending on your taste and what you have on hand. Also, I added WAY more breadcrumbs, and next time I'd add even more as the soup soaked up a lot of it.

You can find the recipe for Chicken and Broccoli Divan here, which is on the Campbell's website.

BBQ Pork Tenderloin and Greek Pork Loin Ribs

Wow. I can't believe how long it's been since I've posted. I've been cooking a lot, and taking pictures of some things, but just haven't got them on here! Anyways, I came across a huge deal on pork tenderloin and pork loin ribs at Sobey's a couple weeks ago and ended up buying a couple of each. Like seriously, it was $1.99/lb. Can't beat that price! I made the pork tenderloin a couple weeks ago and it was so good I made the exact same recipe this past weekend too for the in-laws. I use Mike's favorite BBQ sauce so of course HE loves it! And it was actually pretty quick to cook too. I served it with quinoa (loaded up on quinoa at costco!) and a salad with fresh pineapple.

BBQ Pork Tenderloin
*On most of the websites, it said to tie the pork tenderloin together for even cooking. But I didn't and it turned out fine.
2-3lbs pork tenderloin
salt and pepper
Your favorite BBQ sauce recipe or store bought sauce. I used President's Choice Smokin' Stampede Beer & Chipotle BBQ sauce

Season the tenderloin with the salt and pepper and sear all sides in a hot pan with a little bit of oil. Spray a roaster with pam and then put a generous amount of bbq sauce on the bottom, add a little bit of water to thin if desired. Place the seared pork directly on top of the sauce and then cover with a bunch more bbq sauce. Cook at 450 degrees for 45 minutes, basting every 15 minutes. If sauce is getting too thick, thin with a bit of water. Let rest for 10 minutes before slicing.

Greek Pork Loin Ribs
Boil 2 racks pork loin ribs (or whatever other ribs you have) in large pot on stove for 45 min- 1 hour or until meat is super tender and starts falling off the bone. Put in large roaster and season with generous amounts of oregano, lemon juice, and garlic powder (or greek seasoning if you have it). Broil in oven until you're too hungry to wait any longer, or about 25 minutes, flipping half way through. (be sure to season both sides). Mike said they were even better the next day!